BLE Peripheral/Slave 통신연습
WIFI, BLE Combo Module인 EMC3280과 EMC3380에서 지원하는 기능으로 BLE Peripheral과 Central 장치간에 통신연습을 해볼 것이다.
통상적으로 Cellphone(휴대폰)과 BLE 장치간의 관계는 다음과 같다.
| Device | Role of Device | Role of Service |
| Cell Phone/BLE App | Master/Central | Client |
| BLE Device | Slave/Peripheral | Master |
1. BLE Peripheral 시험준비
BLE Master 장치로 Tools 에서 소개한 § LightBlue 또는 § nRF Connect 를 다운로드하여 휴대폰에 설치한다.
2. BLE Peripheral 동작확인
Test1. Notify, Indication 특성을 이용하여 Slave 장치로 부터 Master 장치로 메시지를 보낸다.
| NO | Command | Response | 설명 |
| 1 | AT+BLE=ON | OK | BLE function enable |
| – | AT+BLE? | +BLE:ON OK |
|
| 2 | AT+BROLE=0 | OK | Establish BLE device as slave mode |
| – | AT+BROLE? | +BROLE:0 OK |
|
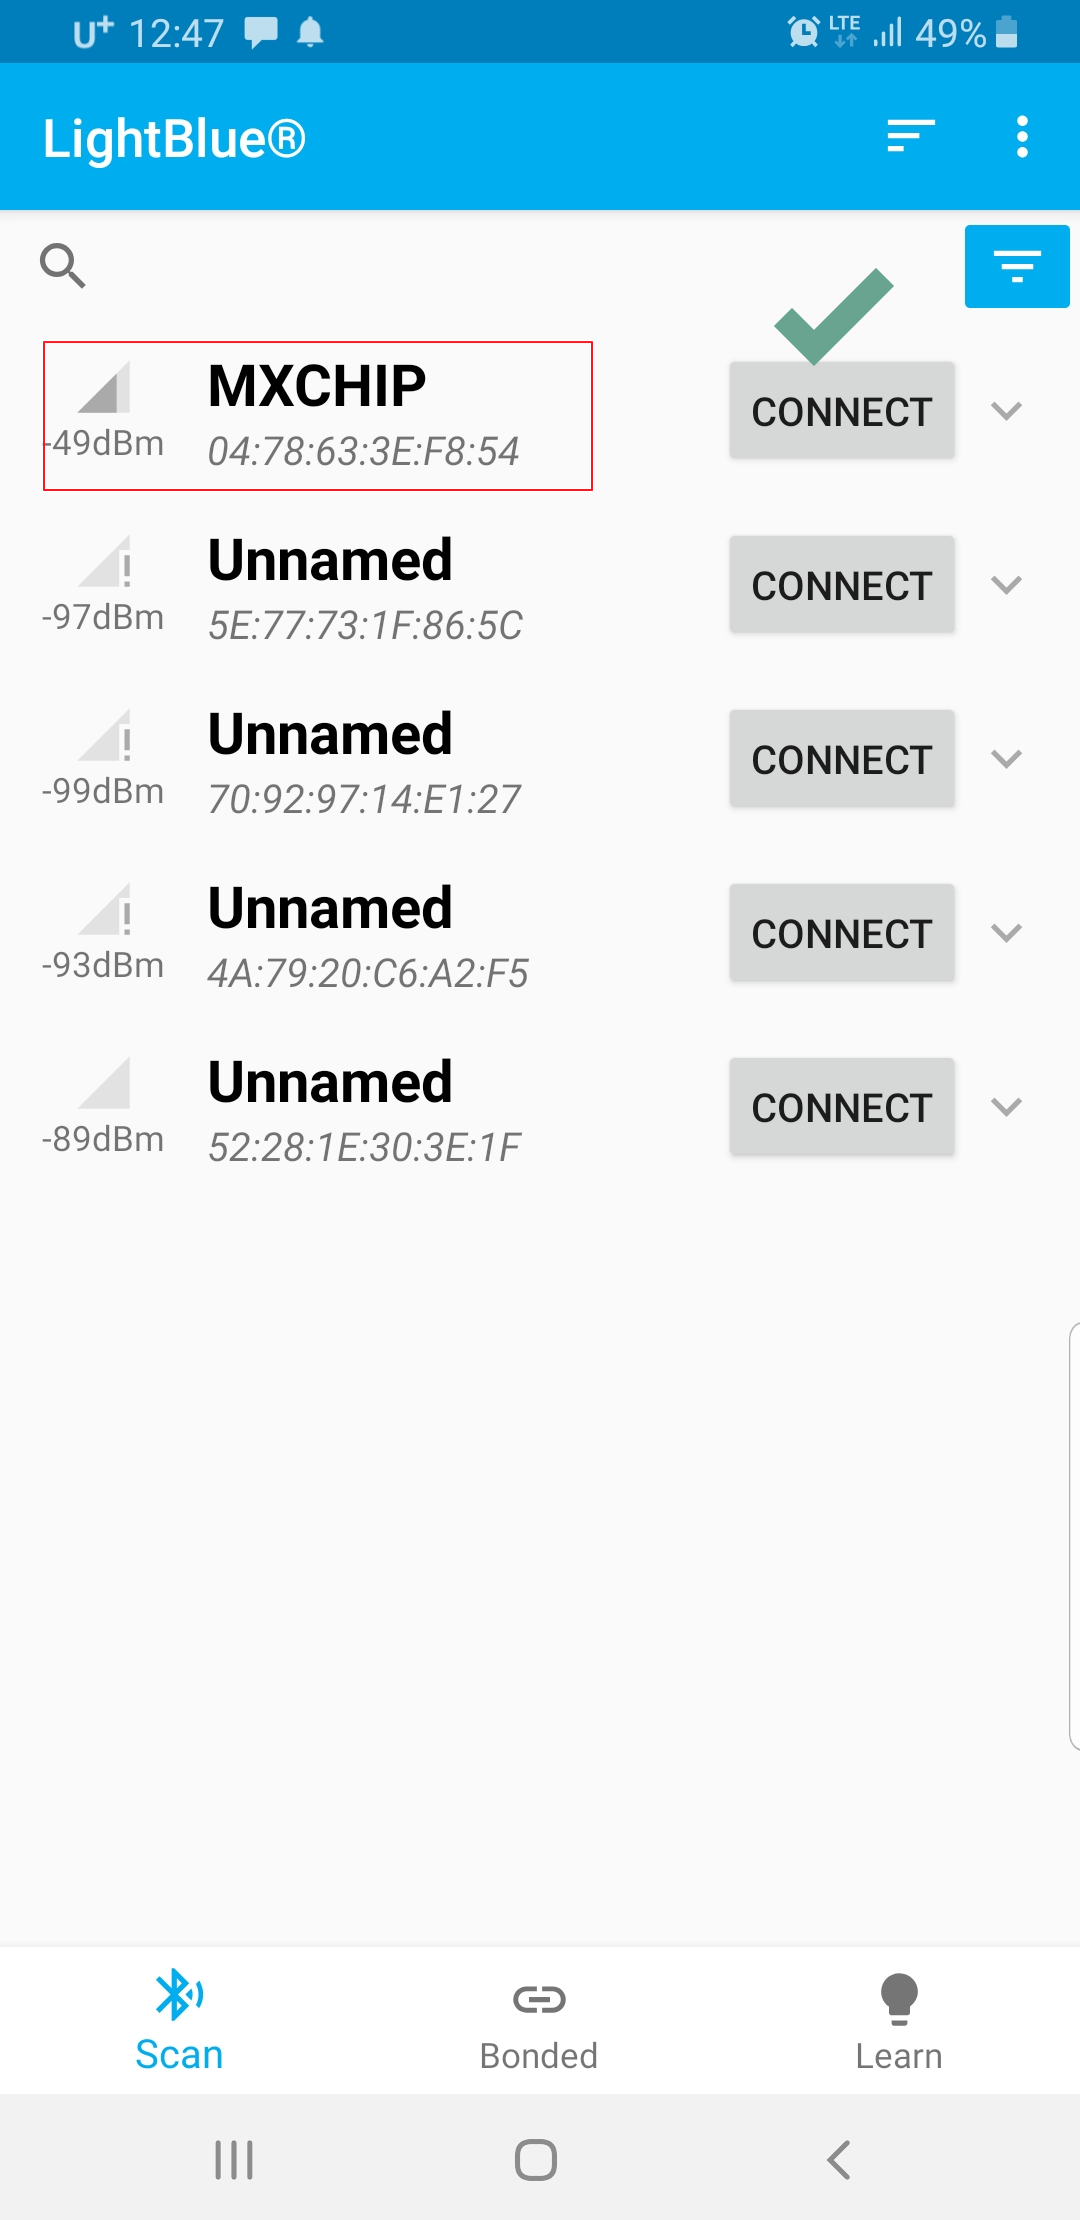
| 3 | Connect in Master(img1 below) | +BEVENT:CONNECTION,ON | |
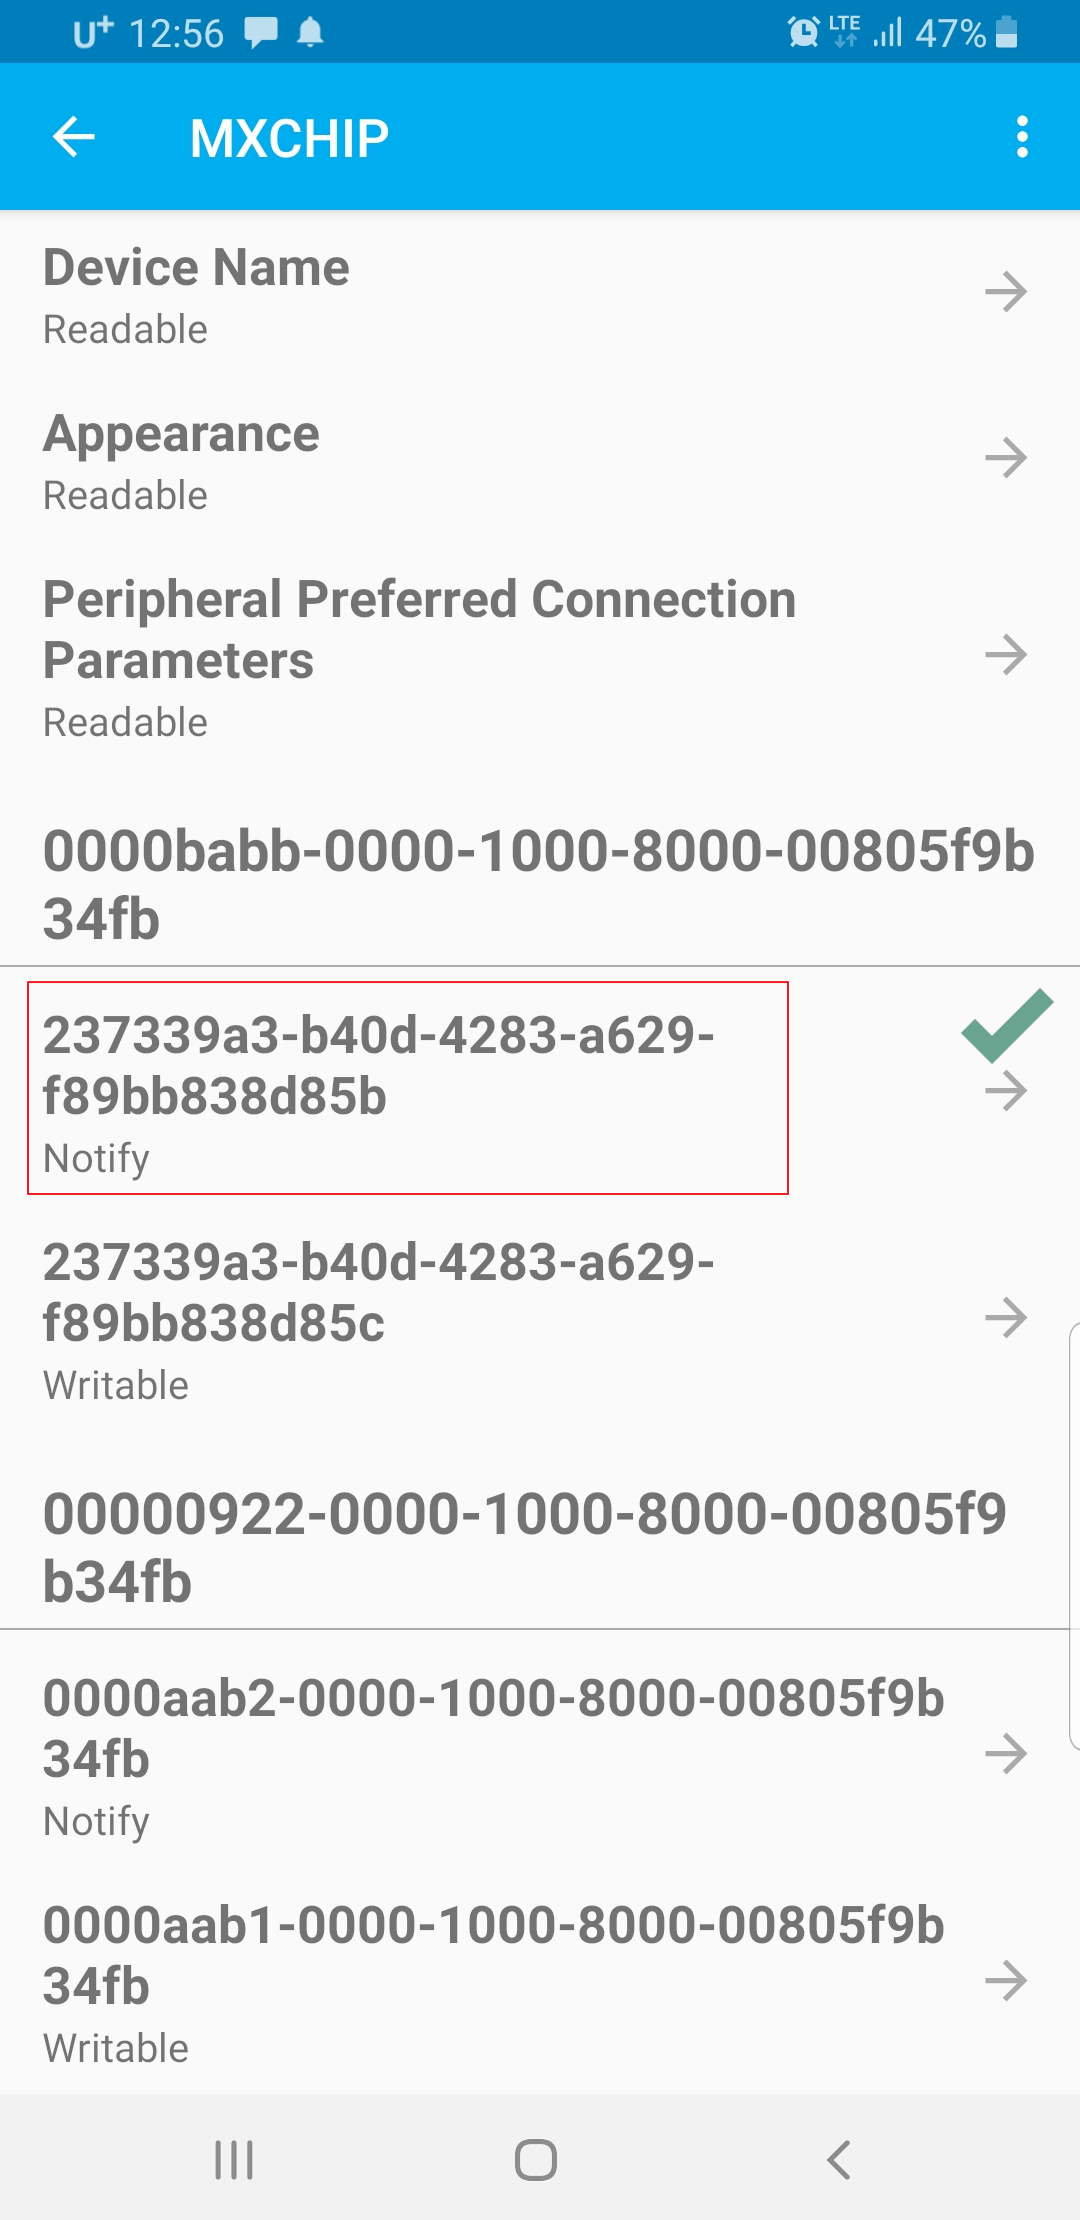
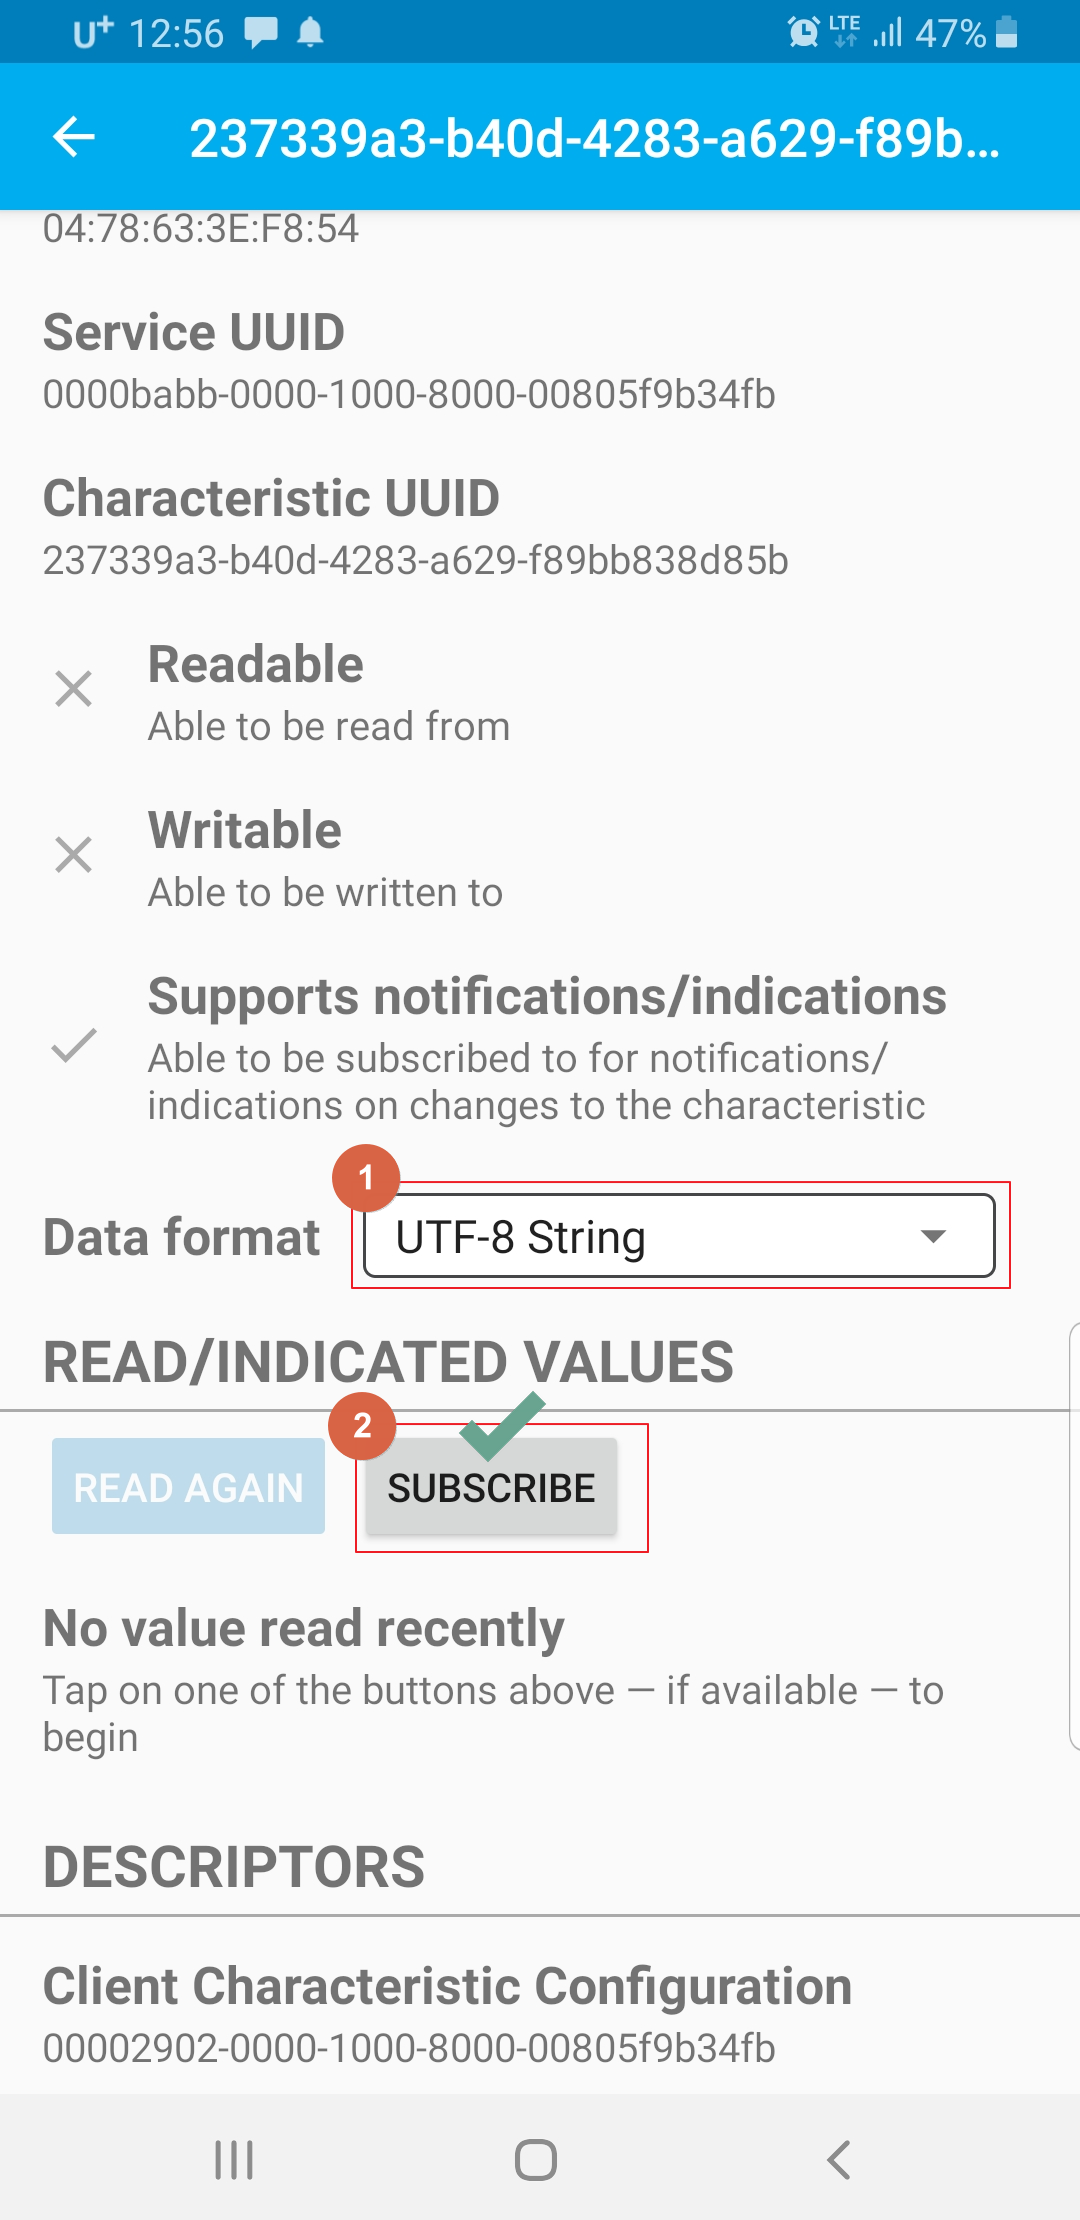
| 4 | Proceed the Img2 and Img3 | ||
| 5 | AT+BSEND=5 | > | |
| 6 | 12345 | OK | “>” 수신후 0.5초 이내 메시지(12345) 입력 |
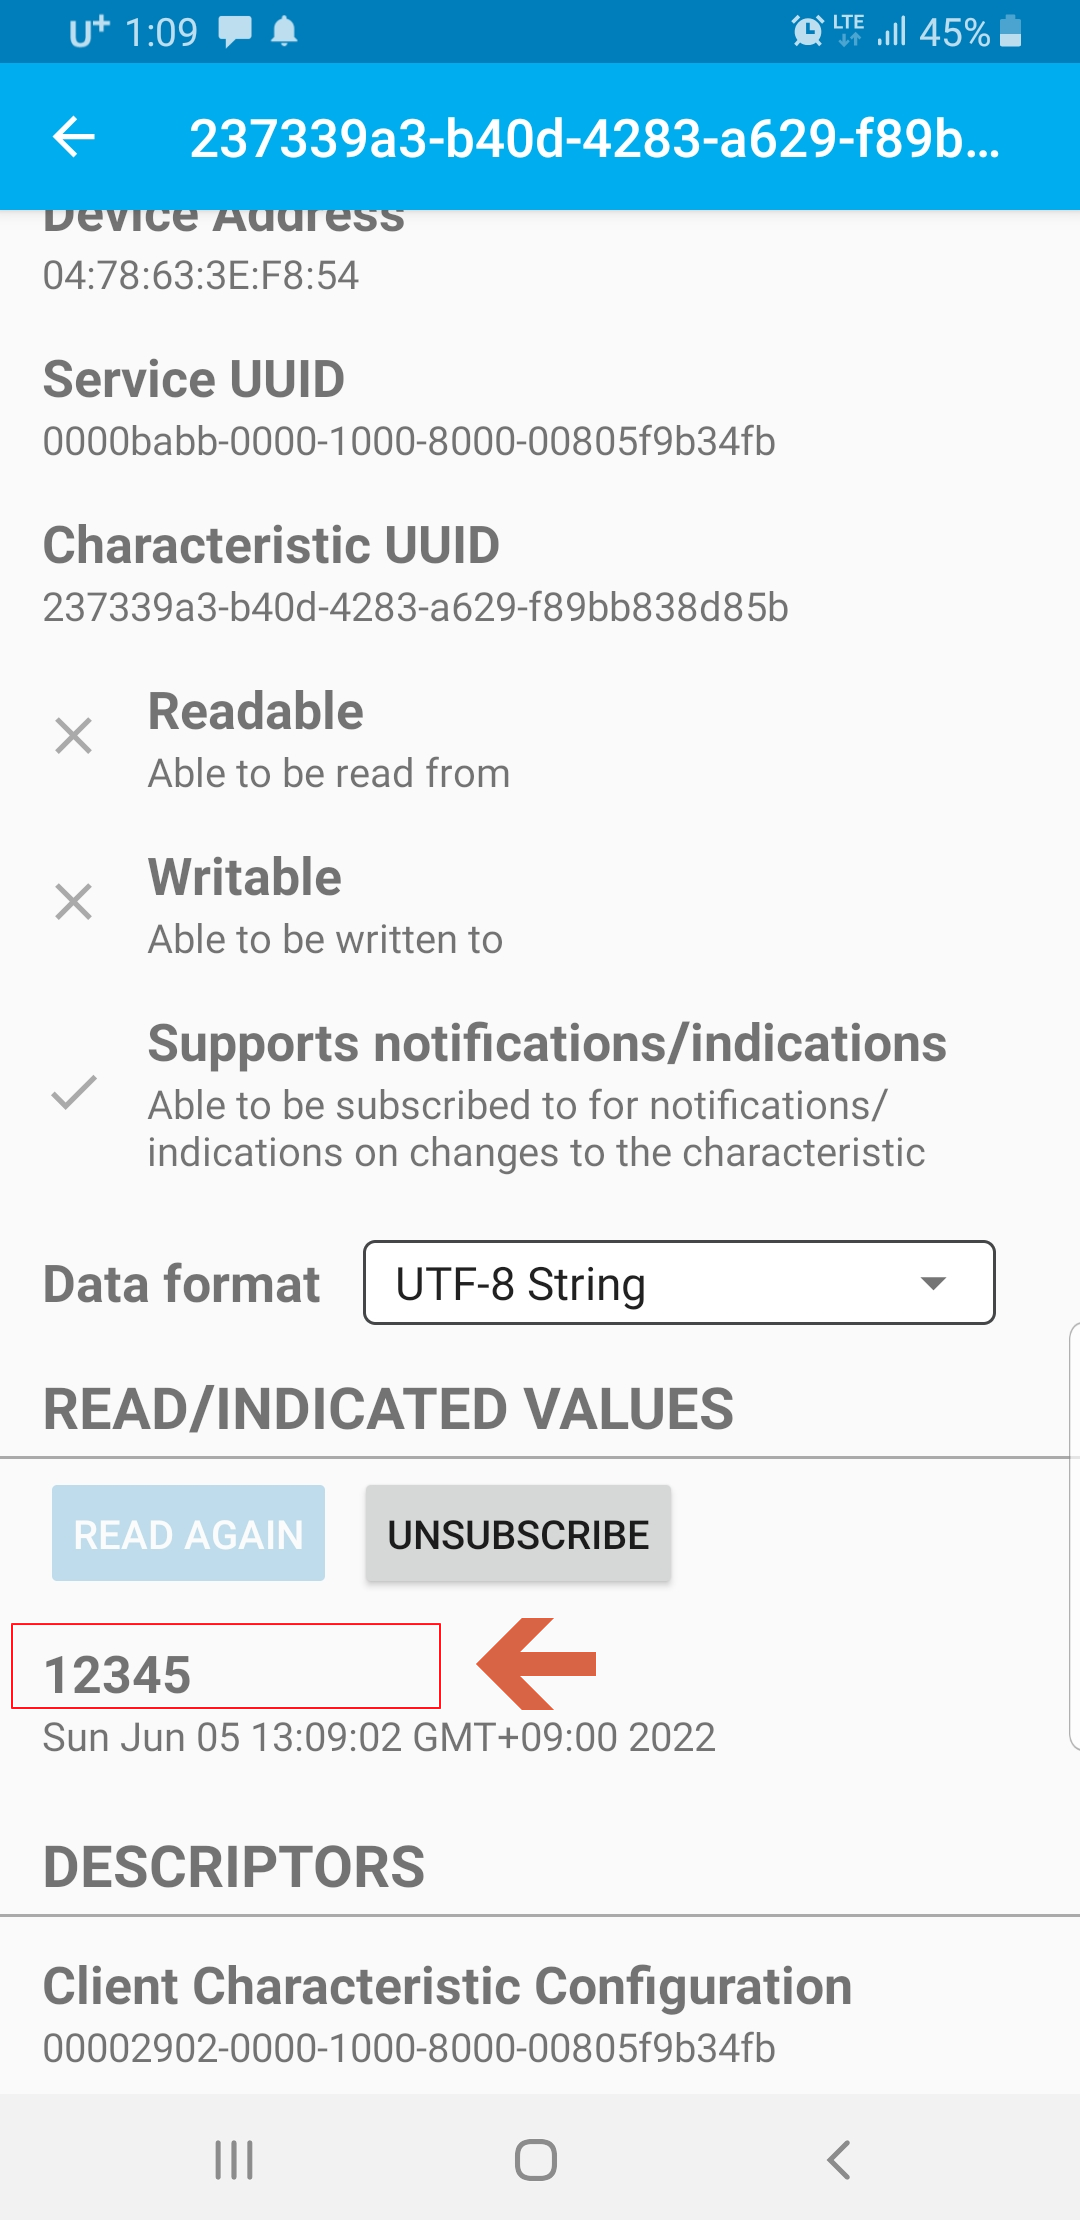
| 7 | Refer to Img4 | Master(App)에서 메시지 “12345” 수신 |
| Img1 → Click “CONNECT” | img2 → Click “Notify” |
 |
 |
| Img3 → Select “UFT String” and click SUBSCRIBE | img4 → Master received “12345” from Slave |
 |
 |
Test2. Write 특성을 이용하여 Master 장치로 부터 Slave 장치로 메시지를 보낸다.
| NO | Command | Response | 설명 |
| 1 | AT+BLE=ON | OK | BLE function enable |
| – | AT+BLE? | +BLE:ON OK |
|
| 2 | AT+BROLE=0 | OK | Establish BLE device as slave mode |
| – | AT+BROLE? | +BROLE:0 OK |
|
| 3 | Connect in Master(img5 below) | +BEVENT:CONNECTION,ON | |
| 4 | Proceed the Img6 and Img7 | ||
| 5 | +BEVENT:DATA,9,hi, slave | Slave에서 메시지 “hi, slave”를 수신하였다. |
| Img5 → Click “CONNECT” | img6 → Click “Notify” |
 |
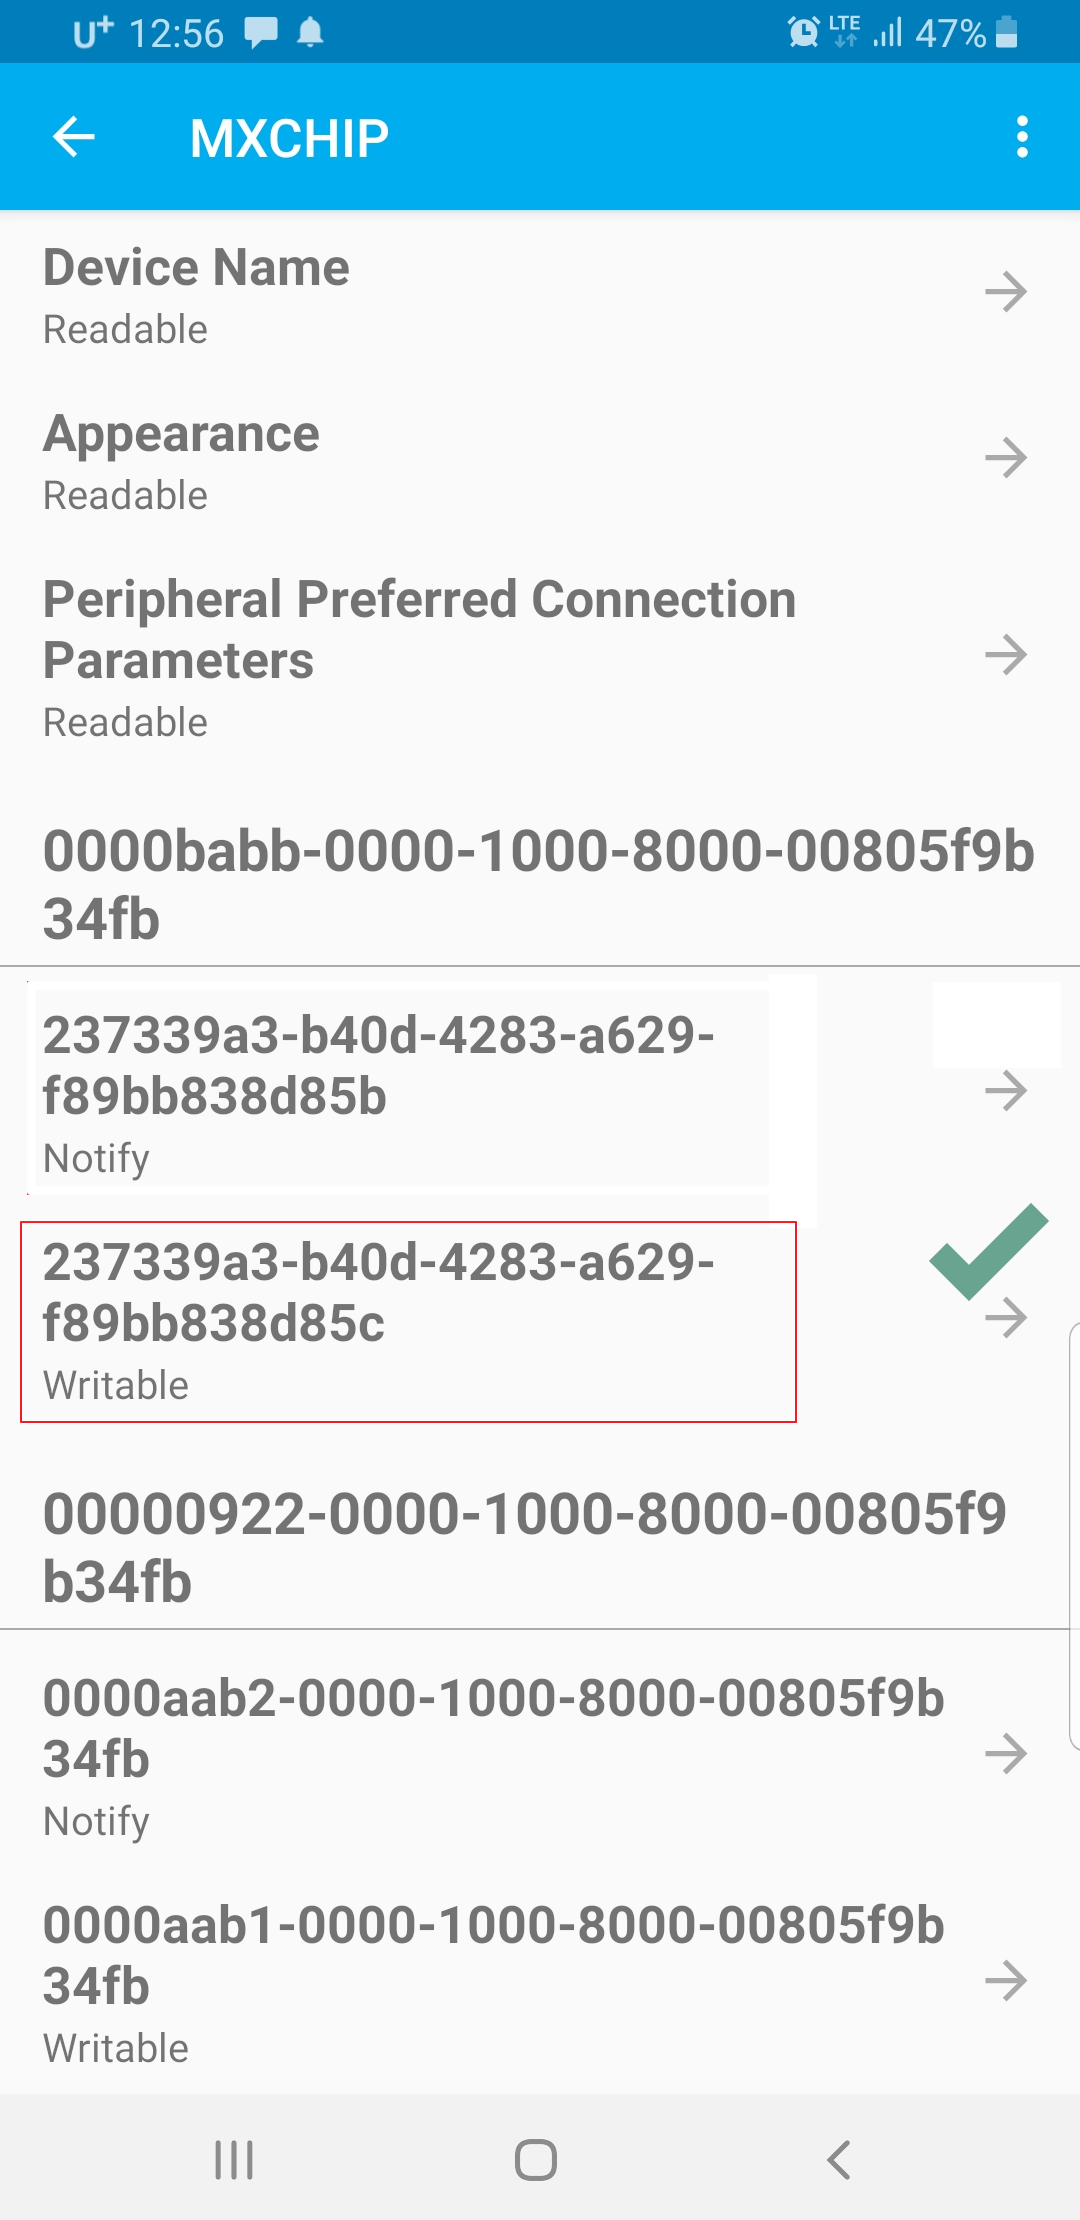 |
| Img7 → Select “UFT String” and Write Message | |
 |

